Make Your Own Cookie Cutters with 3D Printers
Jul 07, 2021
Have you thought about using a 3D printer to create your own cookie cutters? This is a great way to level up your cookie business and give your customers something NEW to talk about--how your cookies were customized just for them! Creating your own cookie cutters is an easy way to customize your cookie orders! All you have to do is design it and print it! I have to be totally straight with you though. When I started learning to design cookie cutters, I was totally lost! It was so confusing to me. However, once you grasp the concept of how a cutter is built, it is so easy to design them!!
Using 3D printers takes lots of patience. They are finicky. They take some time to get set up, they may have issues that come up during printing and you have to figure out what is causing it. For example: stringing, gaps in the walls of your cutter, no filament coming out, etc. If I can learn to design and print cutters...you can too! It does take patience though. There are a lot of resources out there today that were not there when I started 3 years ago. I teach how to design cookie cutters in many different types of software in The Colorful Cookie Club including Fusion 360, CookieCad, Silhouette Studio, and Sure Cuts A Lot. My good friend and Colorful Cookie Club member, Dieter Grotheer from L2CD Printing. He has taught me almost everything I know about the technical side of printing. He knows why they do what they do. He has a Facebook group L2C3D Printing. I call him the "Cookie Cutter Engineer". He is the nicest guy ever!! I also learned quite a bit about designing in Fusion 360 from my good friend and Colorful Cookie Club member Sam, from Sam's Cookie Company. Sam's Bella add in for Fusion 360 is amazingly fast and a huge timesaver! She has a Facebook group Sam's Cookie University.
I'm listing a few 3D Printers below, including the printers I have owned. I am sharing my favorite printer first. It can be overwhelming when you are deciding where to begin. The info below will help you when choosing a 3D printer. I have owned all of these printers mentioned. I can't speak to other brands. I sold all of mine or gave them away and only have my CR6-SE. It is my favorite! No need for the others!
My Favorite :0) Ender CR6-SE
Self leveling, comes with a removable magnetic glass bed and everything you need except filament. It is so quiet! Find it HERE.
Build Volume: 235 x 235 x 250 mm
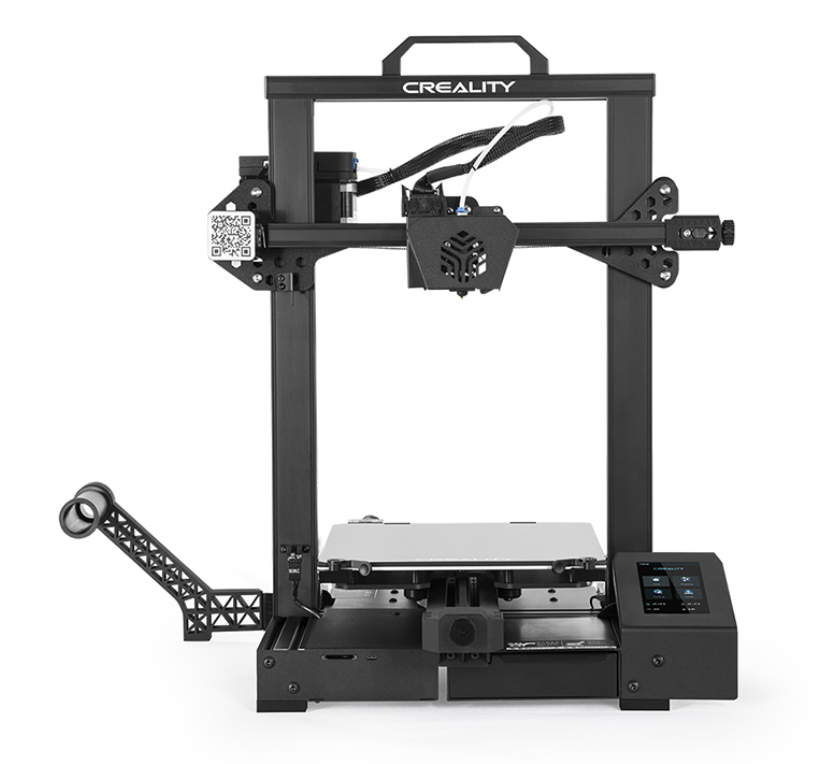
Let's start with the 3D printer I own and LOVE. The CR 6-SE. It prints perfect cookie cutters and is SUPER easy to use. There are tons of reasons why I love this printer, but above all, it's self-leveling. The thing that causes cookiers the most trouble is not having a level bed. This self-leveling feature helps with eliminating the issue. The magnetic glass bed makes this possible. All you have to do is hit the button to start the self-leveling process... and that's it! When you need to level or tram a 3D printer, the extruder is level with the bed. It doesn't mean level as in making sure it is perfectly flat with a level. The surface of your bed may have low and high places. The sensor in the CR6-SE accounts for that when leveling automatically. This printer prints quietly and it's super easy to assemble as well, which means you will be off to printing cutters in no time and multiple cutters at once. Watch me assemble mine HERE and HERE. I ran into a snag, so there are two videos. Sometimes the Creality website site does have sales. Find the CR-6 SE on their website HERE. The CR6-SE comes with everything you need, but filament. You don't need any upgrades. And I have a coupon code HERE to share with you for my favorite filament from CookieCad. It prints so smoothly! Coupon Code is for 10% off 2 spools and free shipping in the USA. You can also enter the code: thecolorfulcookie
Ender 3 Pro
Build Volume: 220 x 220 x 250mm
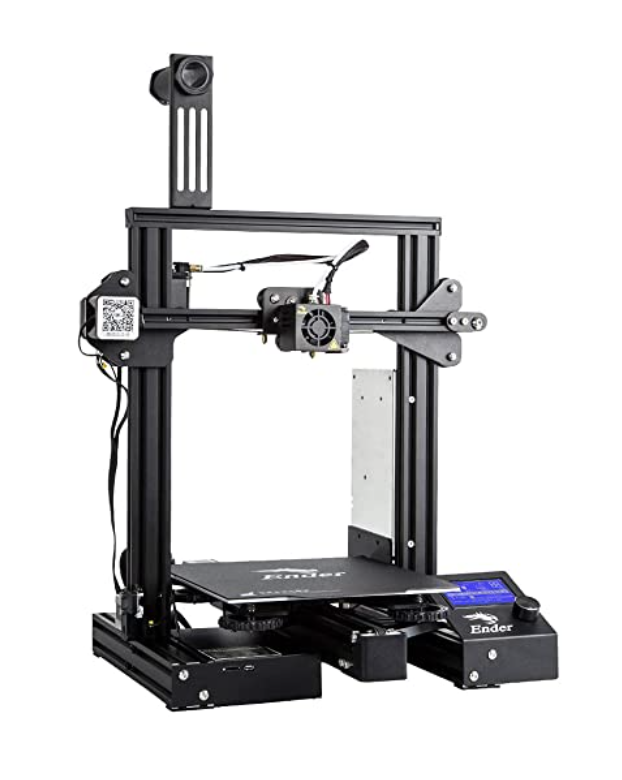
This is another great printer that gives you a wonderful print. Find it HERE. It is NOT self-leveling, but this version makes it much easier to level than other printers. It does have excellent print quality. This printer includes a detachable magnetic heated bed. It does require a little extra work when assembling, but there are tons of videos available that you can watch to make the process easier with a visual aid.You can print more than one cutter at a time. You may want to upgrade some parts, which adds to the cost. So, I recommend going with the CR6-SE :0)
Ender 3
Build Volume: 220 x 220 x 250mm
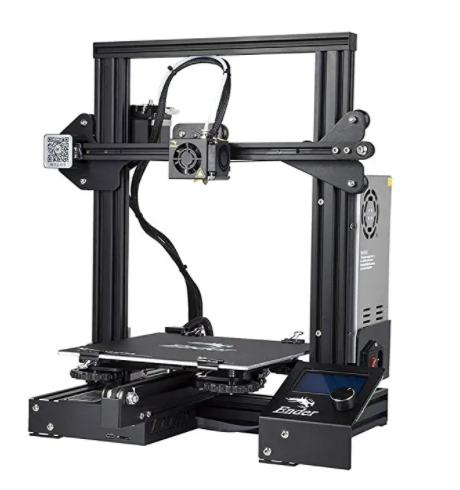
I have also owned this printer. Find it HERE. While it is NOT self-leveling, it does have excellent print quality. It also is the best value for the quality of cutter. You can print more than one cutter at a time. This printer does require a little extra work when assembling, but there are tons of videos available that you can watch to make the process easier with a visual aid. Like everything, it takes some time getting used to when it comes to printing and precision. Once you can get past that though, you're left with a great print from a printer that's an excellent price for what you're getting. You may want to upgrade some parts, which adds to the cost. So, I recommend going with the CR6-SE :0)
Monoprice Mini V2
Build Volume: 4.7" x 4.7" x 4.7" (120 x 120 x 120 mm)
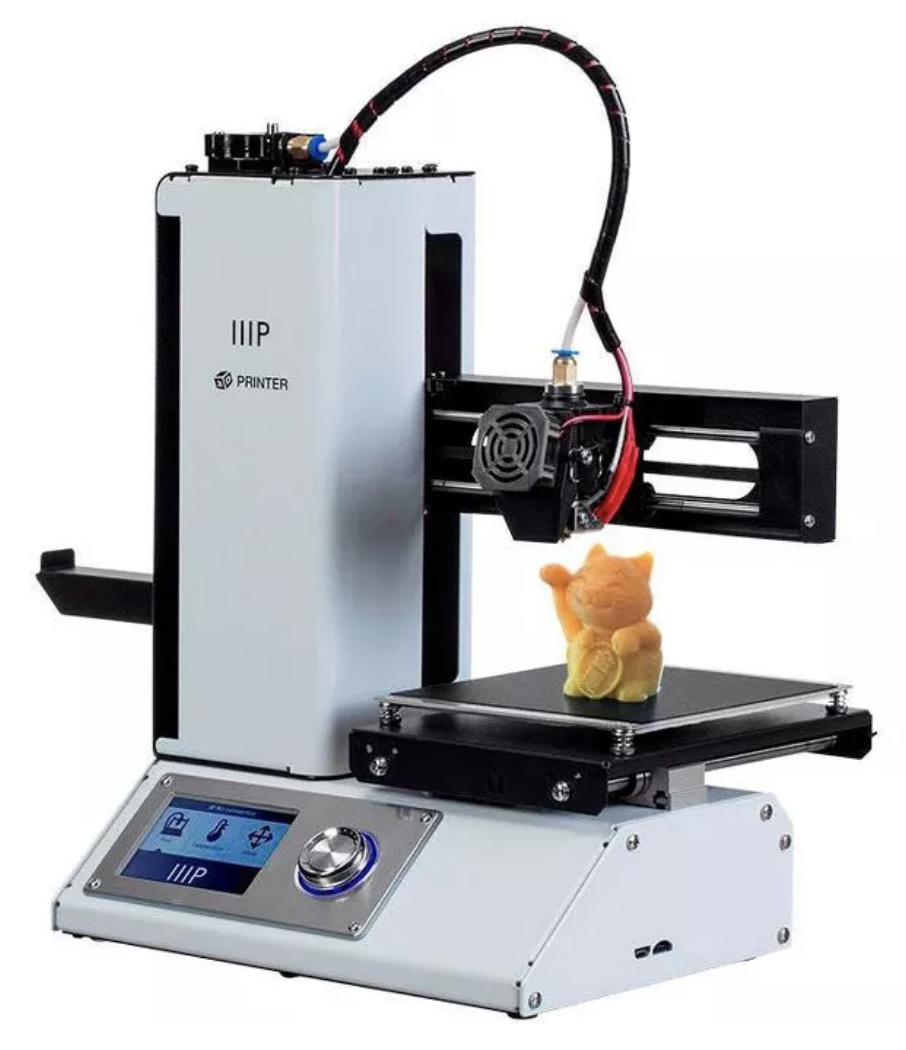
This printer is exactly what it says it is... mini! Find it HERE. It lives up to its name by being compact enough to fit on top of a desk. It has a heated build plate. It is NOT self-leveling. The best part? It ships fully assembled! Which means no work from you. Just take it out of the box and start your printing! I owned this printer, but it only prints one cutter at a time and up to about a 4.5 inch cutter, so I gave it to my son, so he could print small parts for his work.
Additional items that you need to have on hand for any printer:
Micro SD Cards if your printer uses MicroSD.
Micro SD to SD Card Adapter If your printer uses SD cards and you want to use MicroSD cards
Extension Cable Adapter If you want to be able to plug an SD card into your Ender 3 or other printers that have a Micro SD slot only
When it comes to 3D printers there are tons of options, but finding one that works best for you is what matters the most. The ones listed above are options that give you fantastic quality prints. Consider what you want to spend, think about the bed size and just go for it! Use these tips to help guide your choices, and either way, join us over at The Colorful Cookie Club when enrollment is open again to start learning to design cookie cutters.
For slicer software, my favorite slicer is Prusa. Slicing is done after creating the cookie cutter design. It creates a file that your 3D printer can read so it knows where to lay down the filament. That will be a whole other blog post, but I wanted to let you know, that it is my favorite. It is free and easy to use!
You can find all of my 3D favorites including a variety of filaments, parts, and 3D printers HERE in The Colorful Cookie Amazon Shop.
*Food safety with cookie cutters is not discussed in this blog post. A stainless steel rather than the brass extruder is recommended. PLA (polyactide) is obtained from renewable and natural raw materials such as corn.. As far as the cutter and washing go, please do your own research and do what you feel is best for you. Some cookiers will place cling wrap over their dough and cut with it over the top so that the cutter does not touch the cookie. Baking cookies at 350° F should kill bacteria since a temp of 165° F is what kills bacteria in casseroles, meat, and eggs.
Disclosure: Some of the links in this post may be affiliate links, meaning at no additional cost to you, TCC will earn a small commission if you click through to make a purchase.

START CUTTING COOKIE STENCILS TODAY!
Download my Free PDF to find out what you need to start cutting cookie stencils!
Be looking for more freebies and fun tips in your inbox!
We hate SPAM. We will never sell your information, for any reason.
